How to easily host a Flutter app on Netlify in 2020
Published
Ever since it’s official announcement last year, Flutter for Web has come a pretty long way.
From scoring a big fat 0 on most accounts on Lighthouse to coming out of the box with PWA and full SEO support as well as a good chunk of the official Google plugins, Flutter for web is starting to look like a real contender in the cross-platform free for all.
I’ve been hosting most of my stuff on Netlify for a while now, and since there’s no simple and straightforward setting for Flutter when creating a new Netlify Website, this is meant as a short remainder for myself and an easy setup answer for whoever reads this.
We’ll cover how to build and host a Flutter web app in 3 most likely scenarios.
Magic build command, I summon thee:
For all scenarios, we’ll be using the exact same command, here it is:
if cd flutter; then git pull && cd ..; else git clone https://github.com/flutter/flutter.git; fi && flutter/bin/flutter config --enable-web && flutter/bin/flutter build web --release --dart-define=FLUTTER_WEB_USE_SKIA=true
Note that this is going to build and put your app in the usual building directory which is : [your_project_directory]/build/web.
I’ve also taken the liberty to set the —release tag as well as the use-skia one for best performance. The use-skia tag bundles a WebAssembly version of the SKIA renderer.
This gives your app a better performance but has a significant size, you are welcome to remove it if first-load time are a concern or you encounter issues since this is at the time of writing still not a release version.
You should also know that hosting your Flutter app on Netlify gives you the benefit of HTTPS and so your app will come as a PWA with a worker bundled.
Setting up while creating a new site
Just follow the building process as you would until you reach the Deploy settings screen.
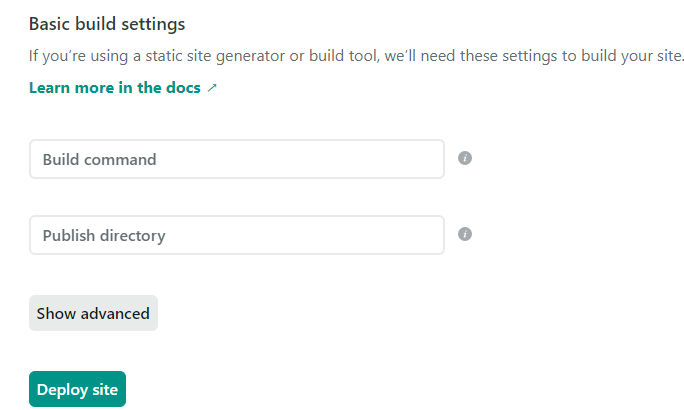
You’ll just need to paste the build command in the aptly named field.
Set the publish directory to build/web.
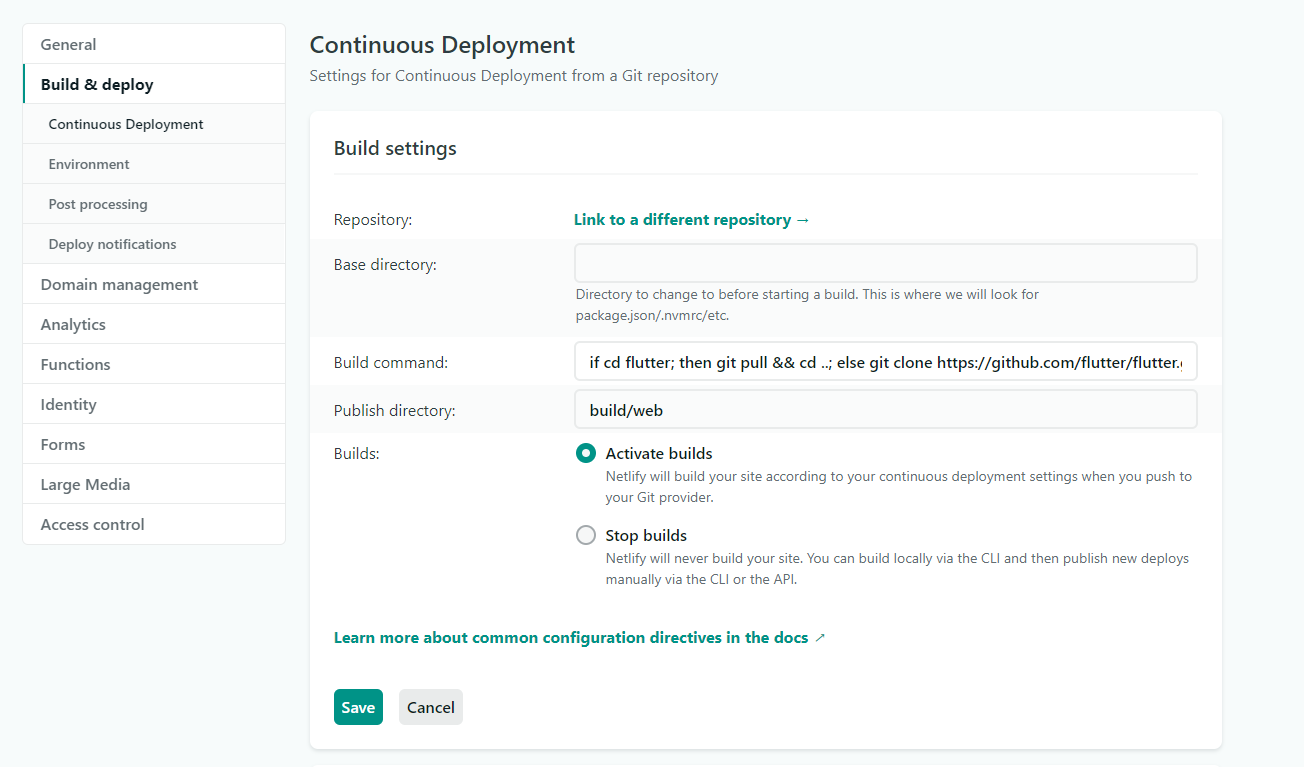
Modifying an existing site
You’ll just need to select the site, go to settings and then click on Build & deploy on the left side menu.
Using a config file
Netlify lets you use a netlify.toml file at the root of your project to deal with it’s deployment settings. The Netlify docs give out a sample file and a full explanation of how to set one up over here.
I’ve made a simple gist containing only what is required for our use case, available here
Few more things
Flutter web still has a pretty heavy bundle size, meaning a longer download and script parsing. I’ll most likely be writing some stuff about optimizing this issue in the future but for now here a few bonus points for Netlify.
Netlify takes care of serving your app either using Gzip or Brotli, compressing your payload for a faster delivery. Compressing your resulting JS makes quite a difference but you should know that you can do even better by also setting up image compression by tweaking a few settings.